
Supplies:
- A sewing machine
- Scissors
- 120 cm’s of ribbon,
- Poly Cotton Fabric
- Corresponding thread
- Small handful of rice
- Needle
- You will also need toy stuffing or the contents of a pillow
Instructions:
First, you will need to download and print this FREE PDF pattern. Ensure you do not check the box on the print dialogue that says “Scale to Fit” or “Fit Page” and check that the test box has been printed at the correct size of 5cm.
Step 1:
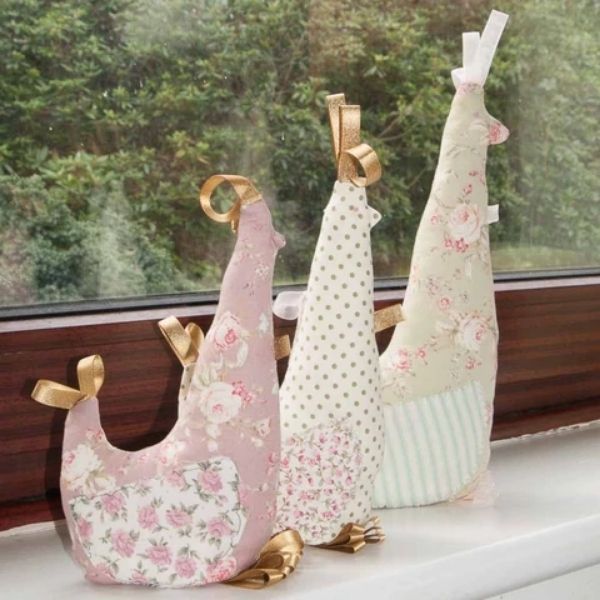
Following the pattern instructions, cut two Chicken bodies and two wings.
Pin the wings onto the bodies and stitch. You can use a straight stitch, zig-zags.. the more patterned the better

Step 2:
Cut your ribbon into 10cm strips.
Fold in half and pin two to the tail and three to the head (comb).
Pin one to the chest (waffle).
I basted my ribbons in place (tacked them in place).

Step 3:
Put your fabric right side to right side and pin.
Stitch around the edge leaving the bottom of the chicken open.

Step 4:
Turn the right way round and press.

Step 5:
Sew a rectangle of fabric 10x10cms, leaving one end open and using a funnel, fill with rice. You can do it without a funnel but you will end up with rice everywhere…
Stitch on a sewing machine.

Step 6:
Stuff the neck and tail with the stuffing.

Step 7:
When the body has a good shape, put the rice bag into the body and stuff around it.

Step 8:
Pin the bottom together and pin.

Step 9:
Slip stitch the opening

Step 10:
Cut three pieces of ribbon, fold over and stitch together.

Step 11:
Stitch to the body on the base, this makes the foot of the chicken. Repeat for the other foot.

Step 12:
Next, you will need to give your chicken some eyes!
There are two ways of doing this, you can sew on two very small buttons or embroider a French Knot, which is easier than it sounds!